11. Uploading a project to the OpenQuake Platform
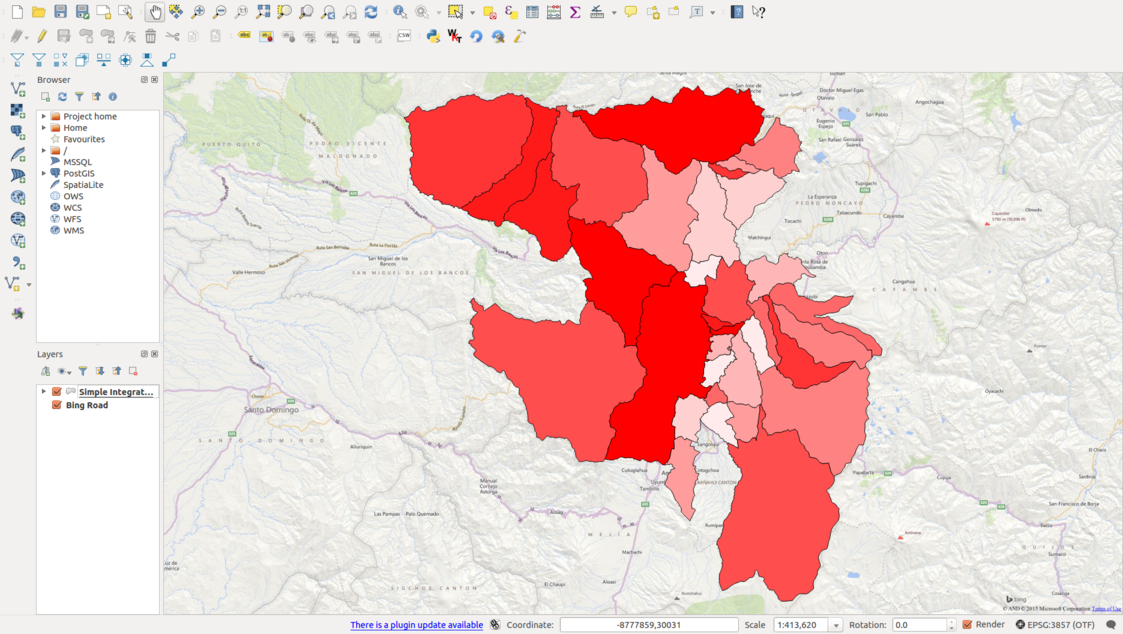
Fig. 11.1 Simplified Integrated Risk analysis as it is seen inside QGIS right before the project is uploaded to the OpenQuake Platform
Once an integrated risk model is complete, and the user is satisfied with results such as those obtained for the example displayed in Fig. 11.1, it is possible to upload projects through the OQ-Platform. Projects are uploaded in order to share them with the wider earthquake risk assessment, earthquake risk reduction, GIS communities, etc. Uploading to the OQ-Platform also supports the ability to visualize models using advanced visualization tools and the mapping of the data over the web. In addition, sharing the models on the OQ-Platform allows users that are not QGIS savvy to dynamically interact with the data. The mapping and visualization over the web is accomplished using the OQ-Platform (Fig. 11.2) and the Social Vulnerability and Integrated Risk Viewer (see the web application and the corresponding documentation).
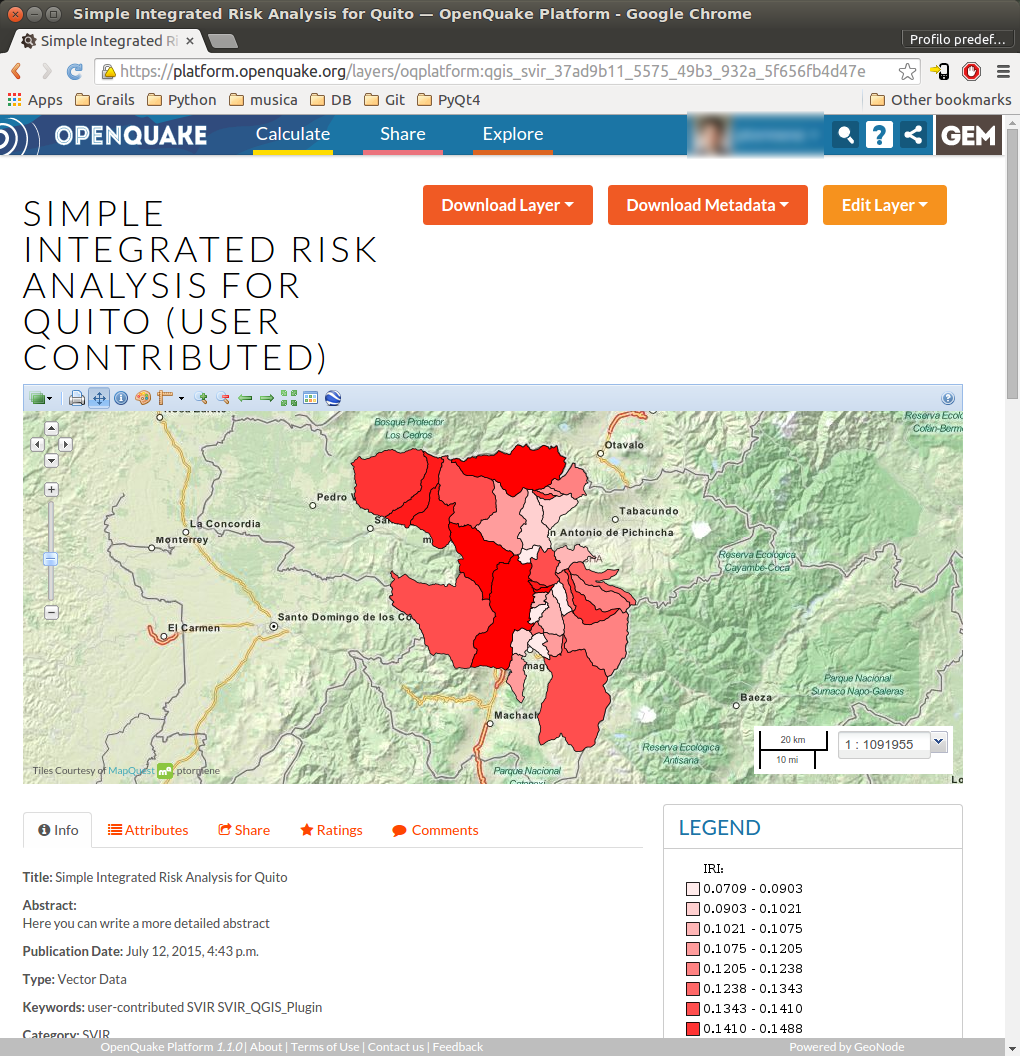
Fig. 11.2 The same simple example shown in Fig. 11.1, visualized through a web browser after it has been uploaded to the OpenQuake Platform
To upload a project to the OQ-Platform, click Upload project to the OpenQuake Platform. This will result in the opening of a dialog window in which, depending on the context, the window will look like those delineated in Fig. 11.3 or Fig. 11.4. The former will be displayed if the current project has never been uploaded to the OQ-Platform. In such cases, the user is invited to provide a project title that will become the title of the layer that will be created on the Platform. A second field will contain the abstract, where the user can provide a general description of the project.
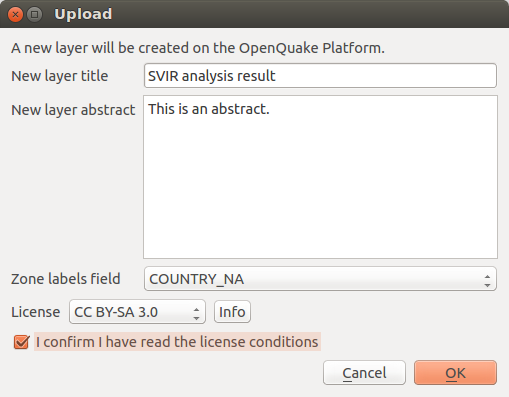
Fig. 11.3  Uploading a project to the OpenQuake Platform
Note
In order to be able to correctly utilize the advanced visualization tools found on the OQ-Platform, the selection of a Zone labels field is required (see Fig. 11.3).
The user must designate the Zone labels field within their dataset. The latter is a field containing unique labels (or identifiers) whether these are individual country names, district names, or census block numbers, etc. Delineating a zone field when uploading to the OQ-Platform is imperative to allow the graphing components of the Social Vulnerability and Integrated Risk Viewer to render the visualization using the zone’s labels. Without the latter, comparisons among places within the graphing tools are not possible. It is also mandatory to choose a license and to click on the checkbox to confirm to be informed about the license conditions. By clicking the Info button, a web browser will be opened, pointing to a page that describes the license selected in the License dropdown menu. When OK is pressed, the active layer is uploaded to the OQ-Platform and it is applied in the same style visible in QGIS. Furthermore, the current project definition is saved into the layer’s metadata, inside the Supplemental information field.
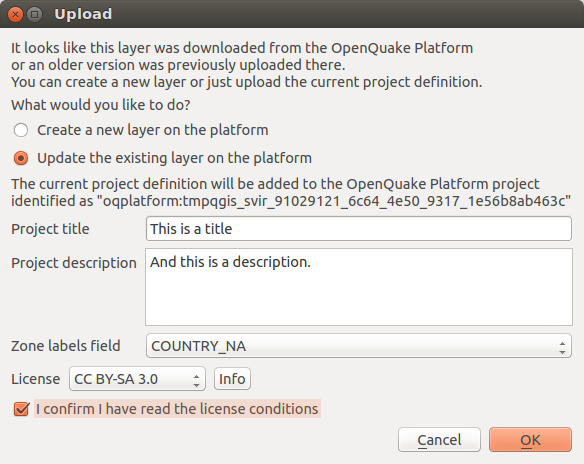
Fig. 11.4 Updating a project that has already been uploaded to the OpenQuake Platform
This second version of the Upload dialog window is displayed when the active layer appears to have been already shared through the OQ-Platform (the ID of a OQ-Platform’s layer was previously associated with this layer). In such cases, it is possible to create a brand new layer, ignoring the previously uploaded (or downloaded) project, or to update the current layer. The updating process consists of adding the current project definition to the set of project definitions associated to that layer on the OQ-Platform. This is a much faster procedure because no geometries need to be uploaded, and only the metadata of the layer will be changed.